Zapier App
Use Case 3: Sync Jira Issue Status
Overview
The Bug Fix Confirmation Status Changed trigger combined with the Fetch Bug action in the Test IO Zapier app allows you to update the bug's status in your bug tracker when Test IO receives a positive bug fix confirmation.
This integration assumes the bug has already been exported from Test IO to Jira Cloud (or another bug tracker).
Here, we'll demonstrate how to sync Jira Issue status with Test IO using the Test IO and Jira Software Cloud Zapier apps.
Configure Bug Fix Confirmation Status Changed trigger (Test IO)
- Search for and select the Test IO Zapier app.
- Select "Bug Fix Confirmation Status Changed" as the Event (required) field and press Continue.
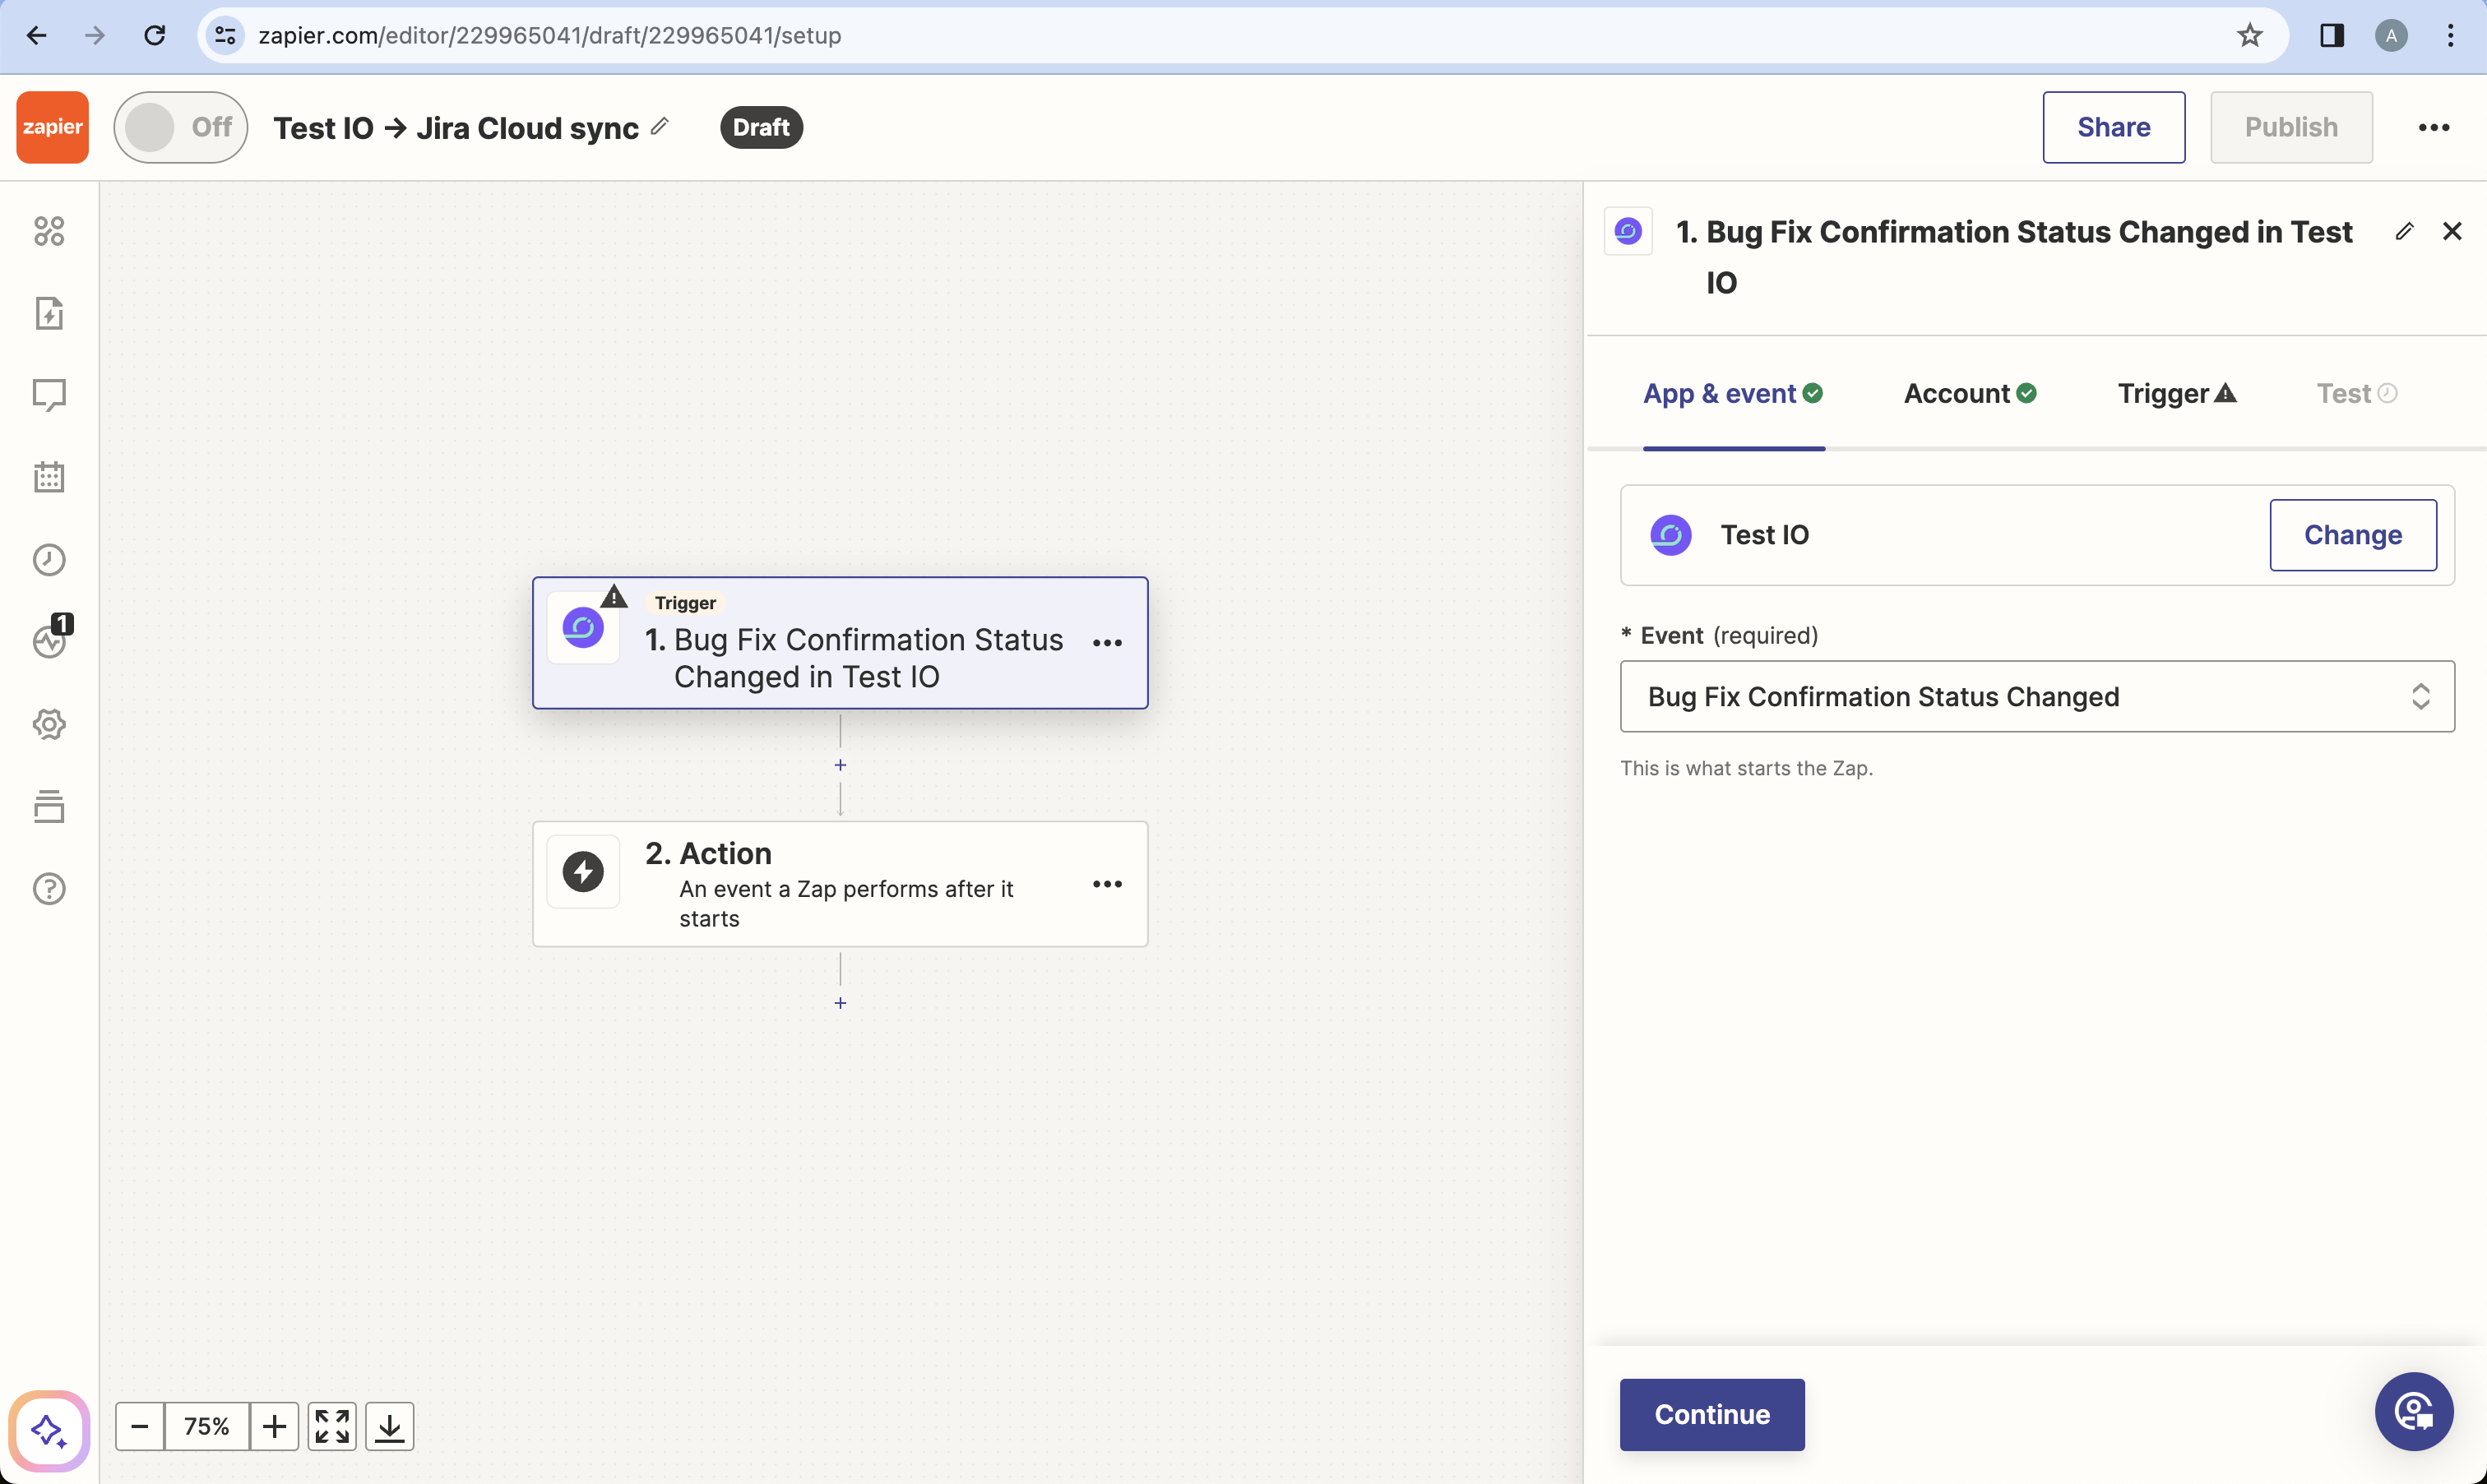
Screenshot 1. Select a trigger - (Account Tab) Sign in with your Test IO API token.
- (Trigger Tab) Select your Test IO product and section (use 'default-section' if your product doesn't have sections). Press Continue.
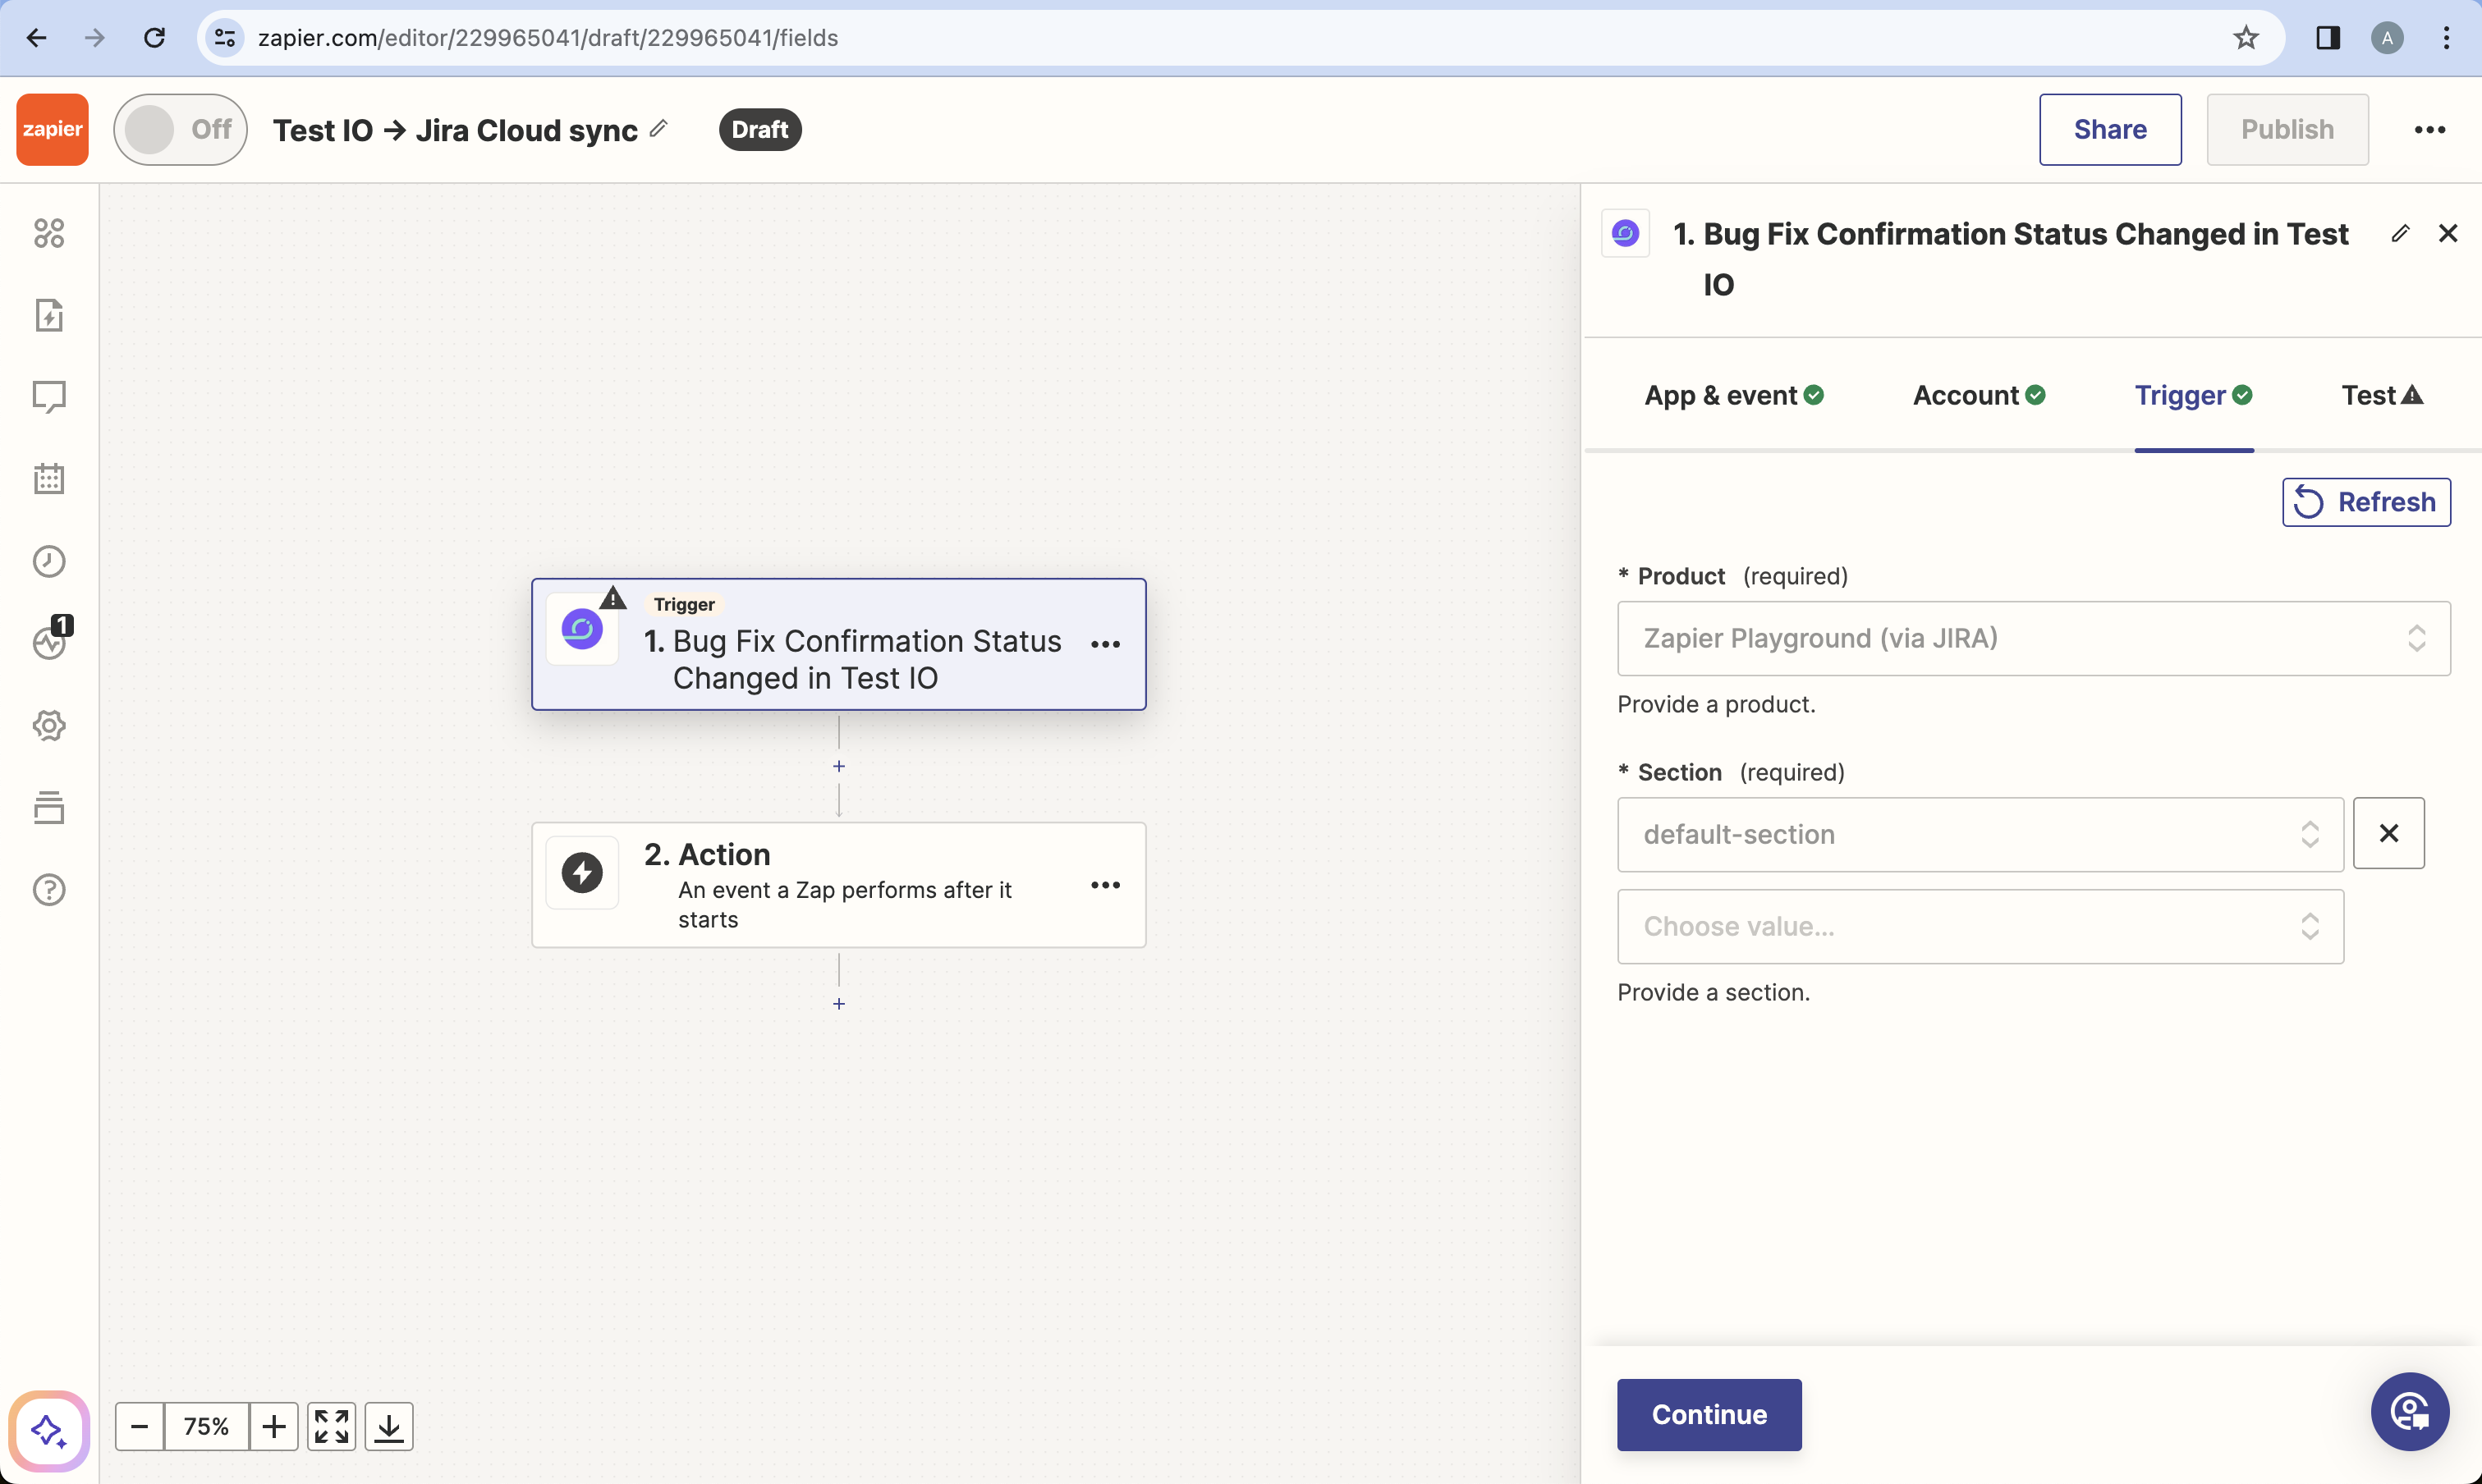
Screenshot 2. Select product and sections - (Test Tab) Press Test trigger. You may need to repeatedly press Find new records until a bug fix confirmation with a "passed" status is found. Press Continue with selected record.
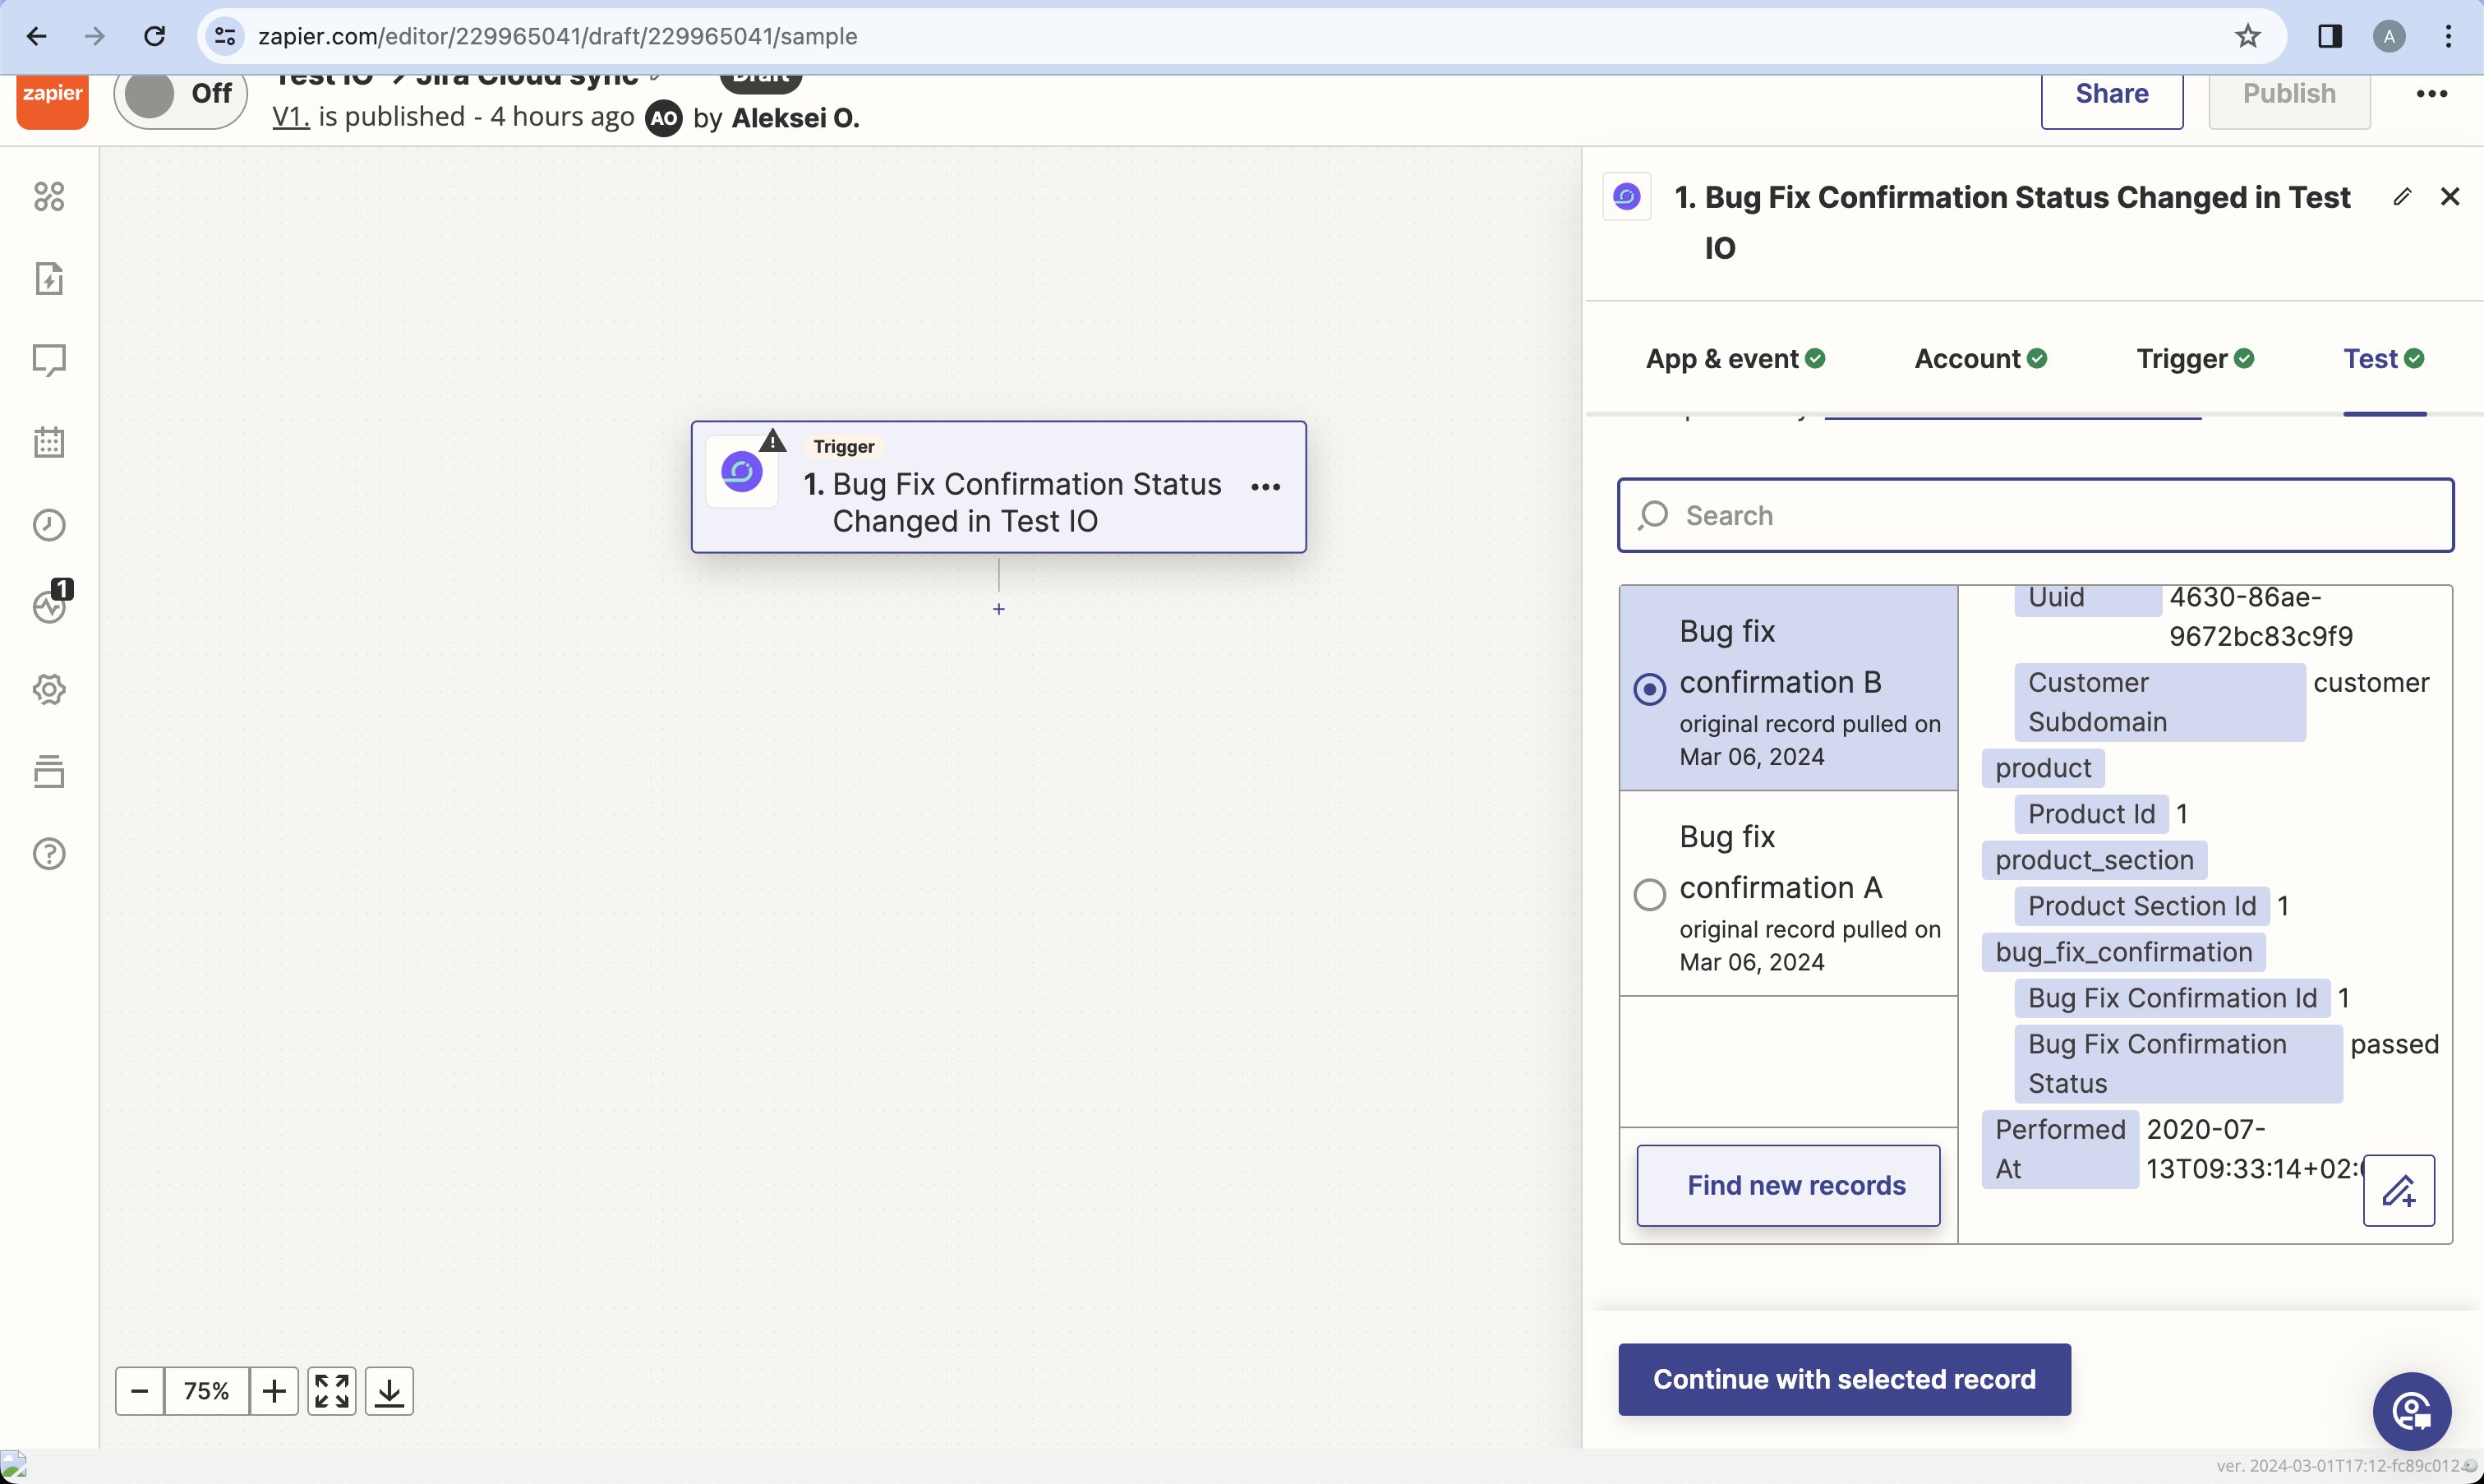
Screenshot 3. Test trigger
Configure Filter by Zapier (Zapier)
- Search for and select the Filter by Zapier app.
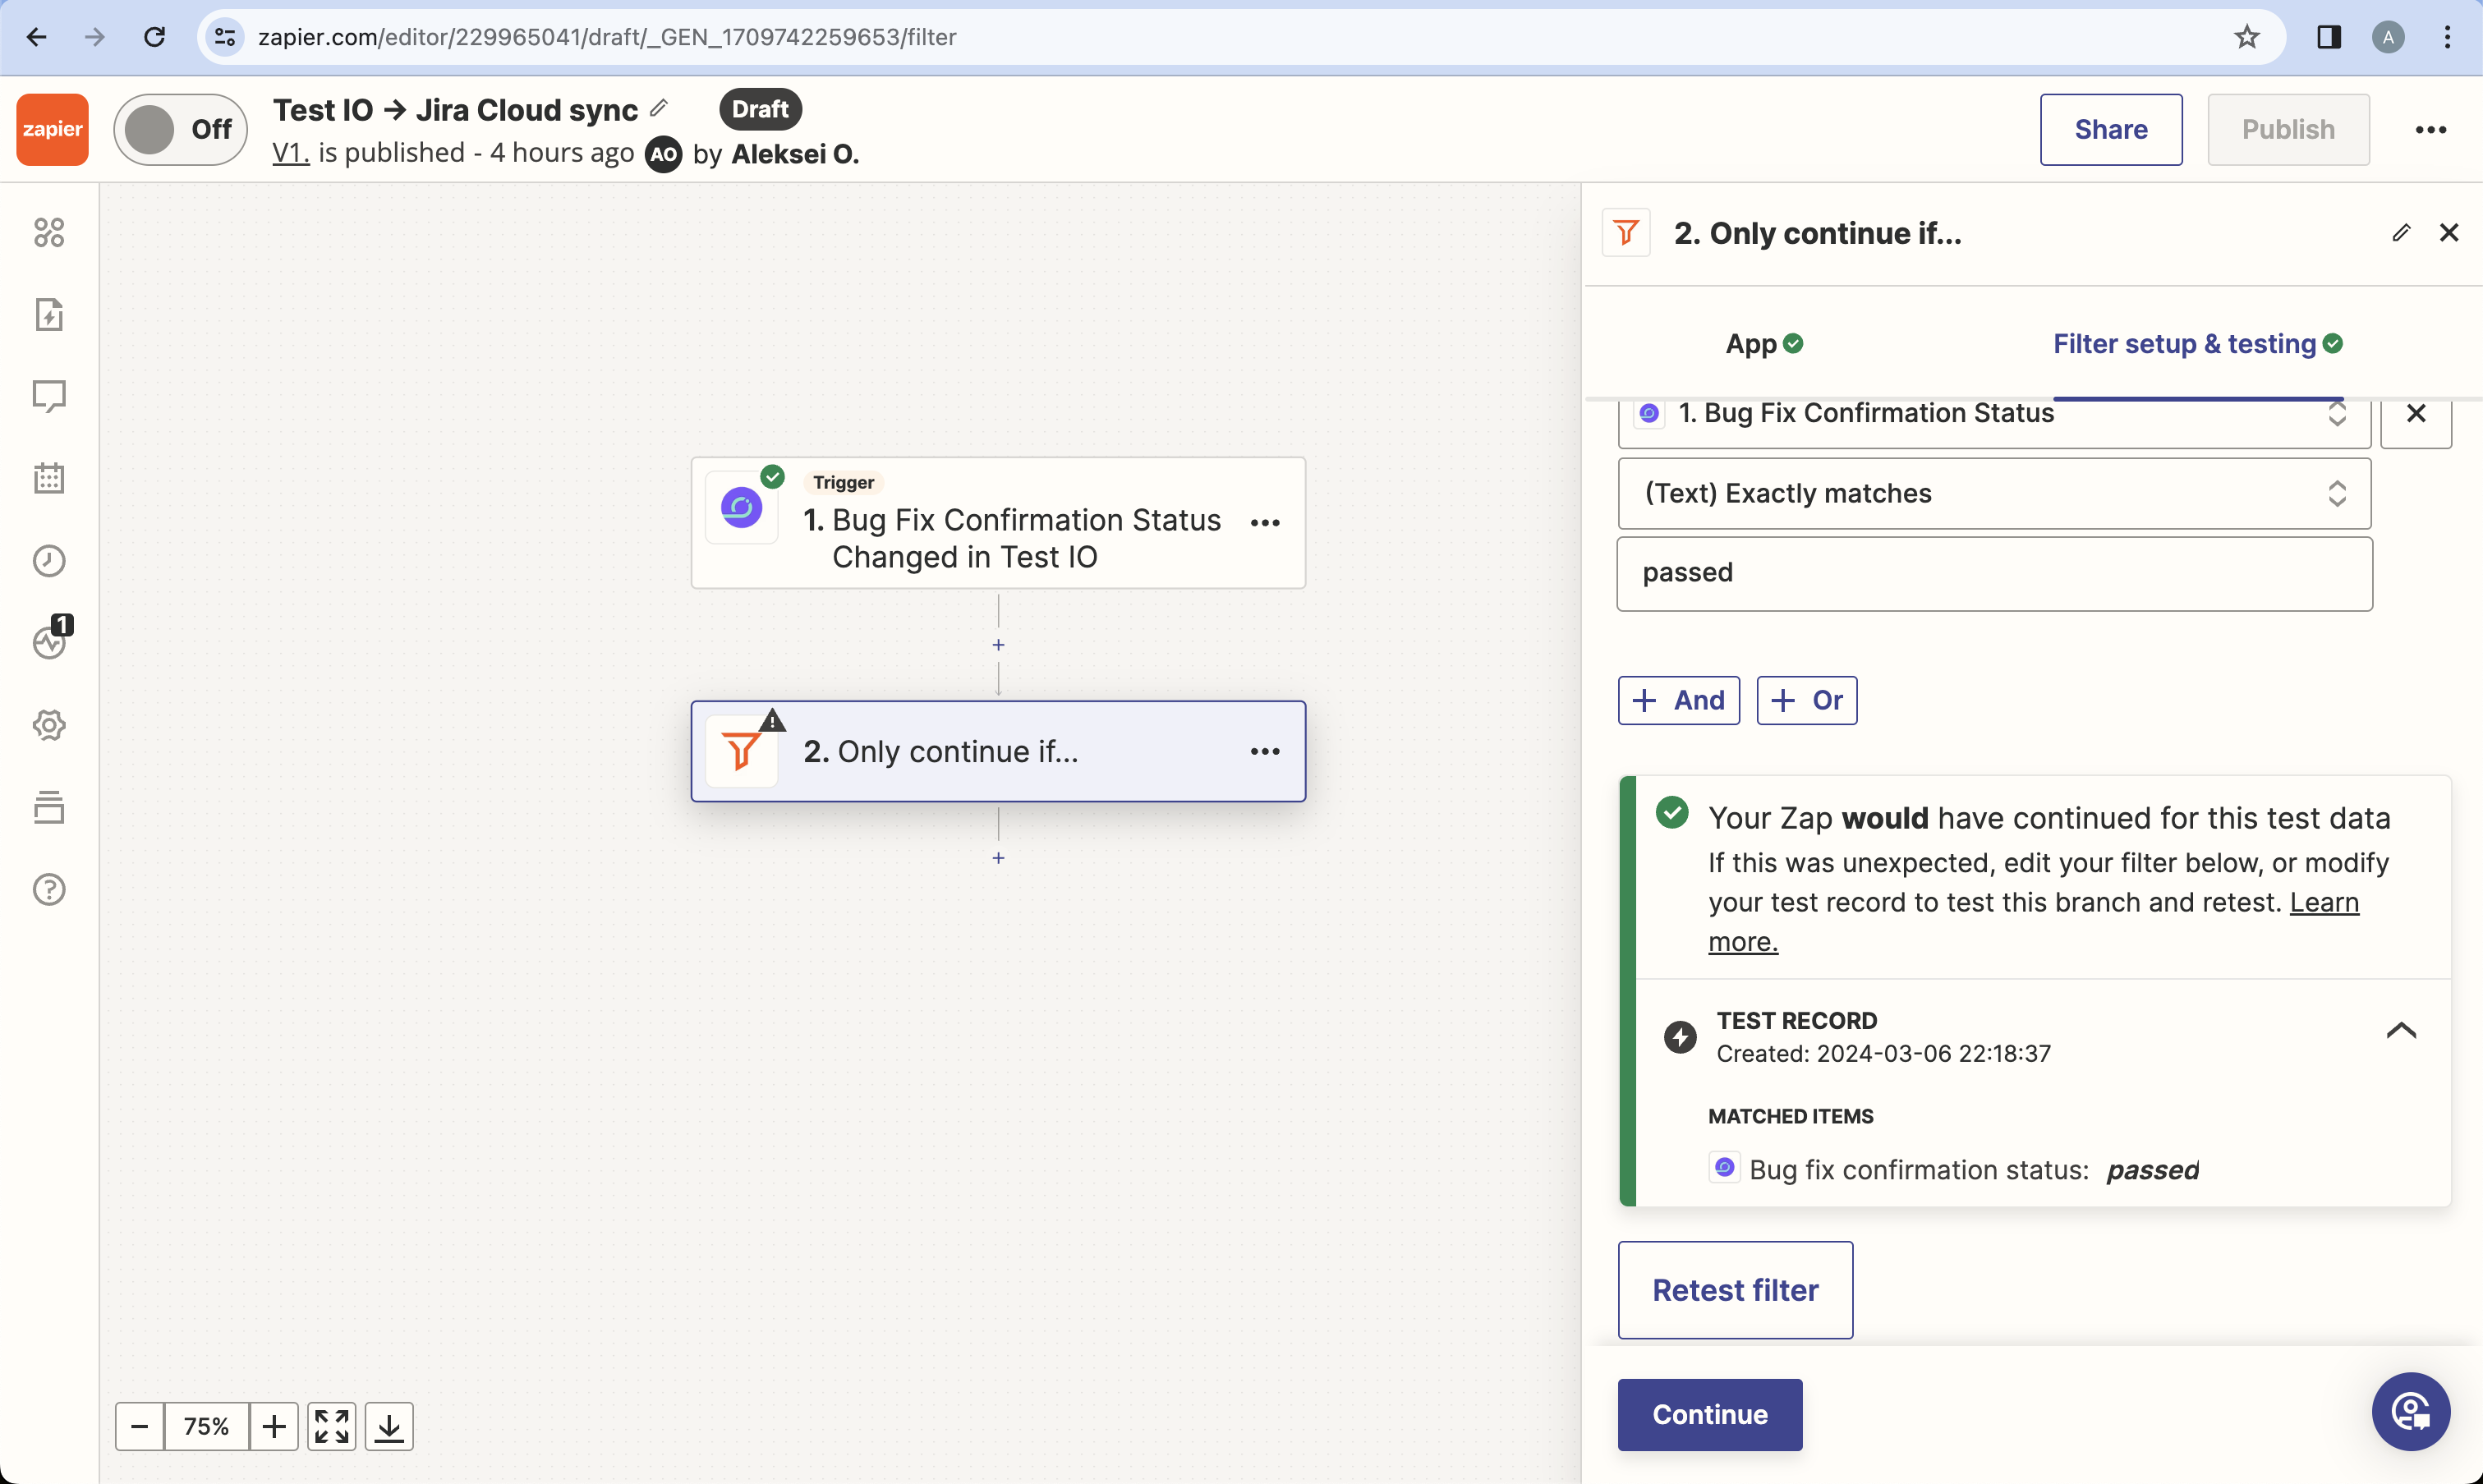
- Select "Bug Fix Confirmation Status" from the previous trigger, "(Text) Exactly matches", and then enter "passed".

Screenshot 4. Filter setup - Test the filter. Ensure the test is successful, then press Continue.
Screenshot 5. Confirm testing
Configure Fetch Bug (Test IO)
Now we'll fetch the bug details from Test IO:
- Search for and select the Test IO Zapier app.
- Select "Fetch Bug" as the Event (required) field and press Continue.
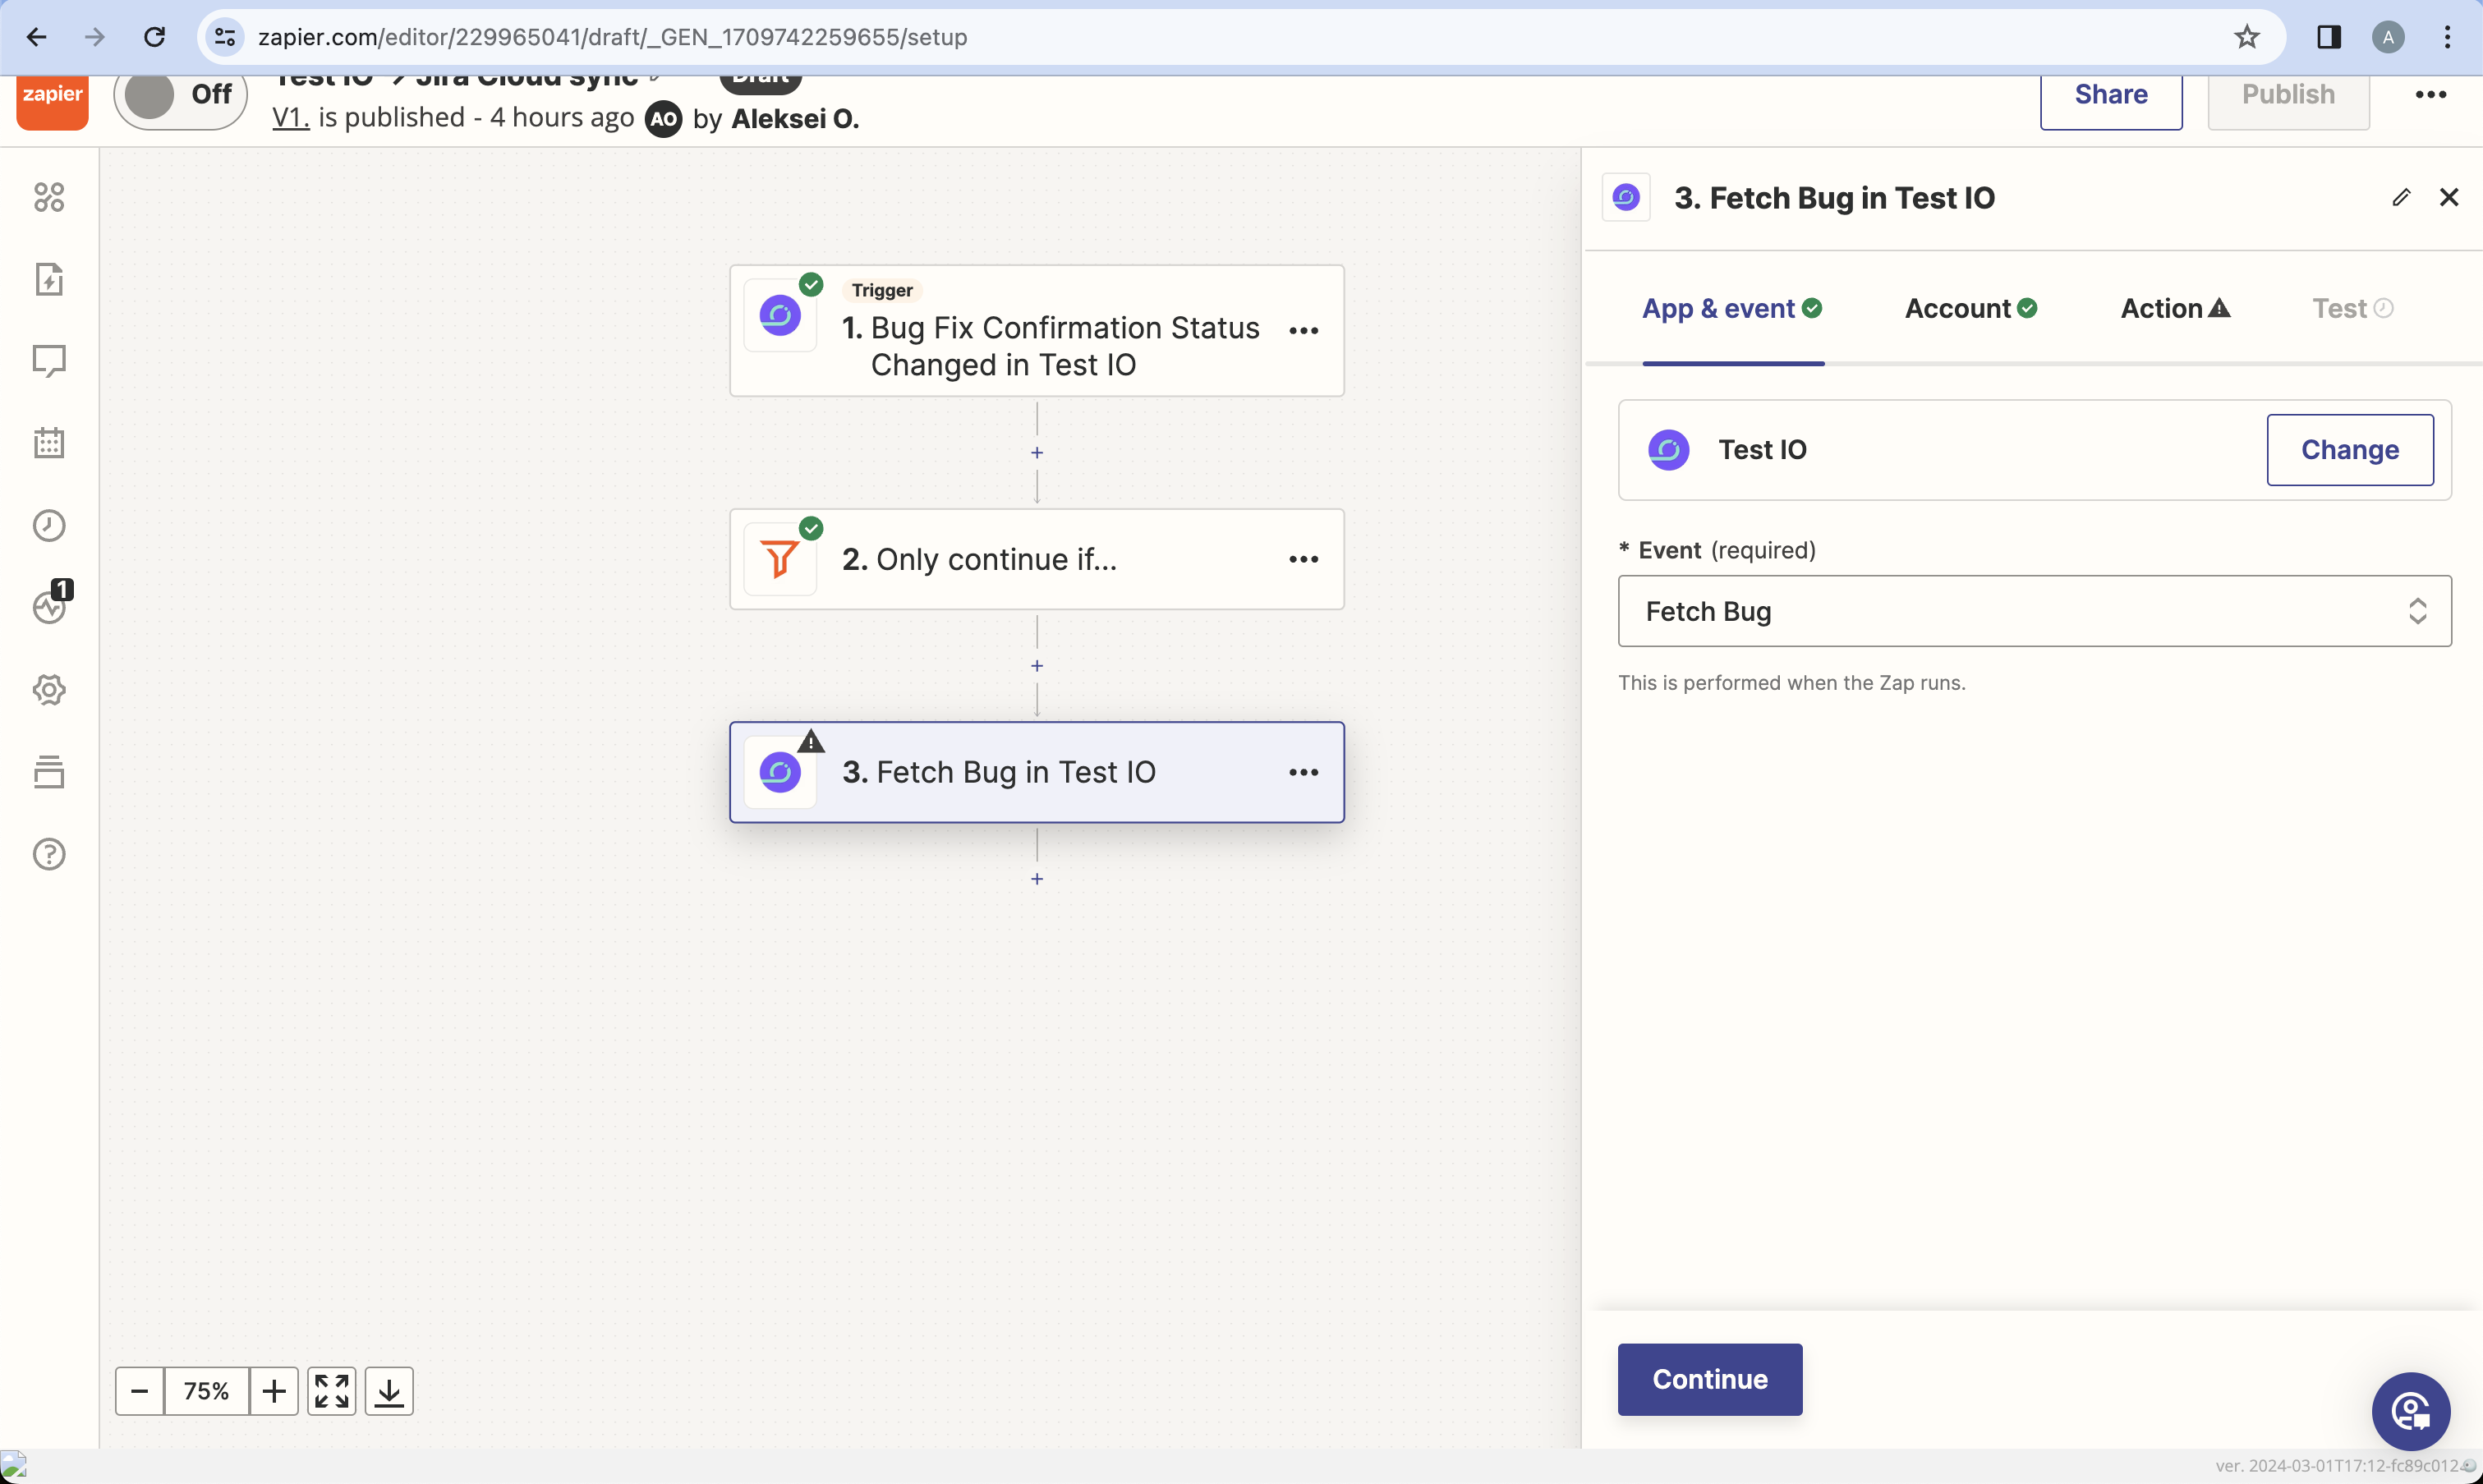
Screenshot 6. Select an action - (Account Tab) Authenticate with your Test IO API token if needed.
- (Action Tab) In the Bug ID field, select "Bug Report Id" from the Bug Fix Confirmation trigger output. Press Continue.
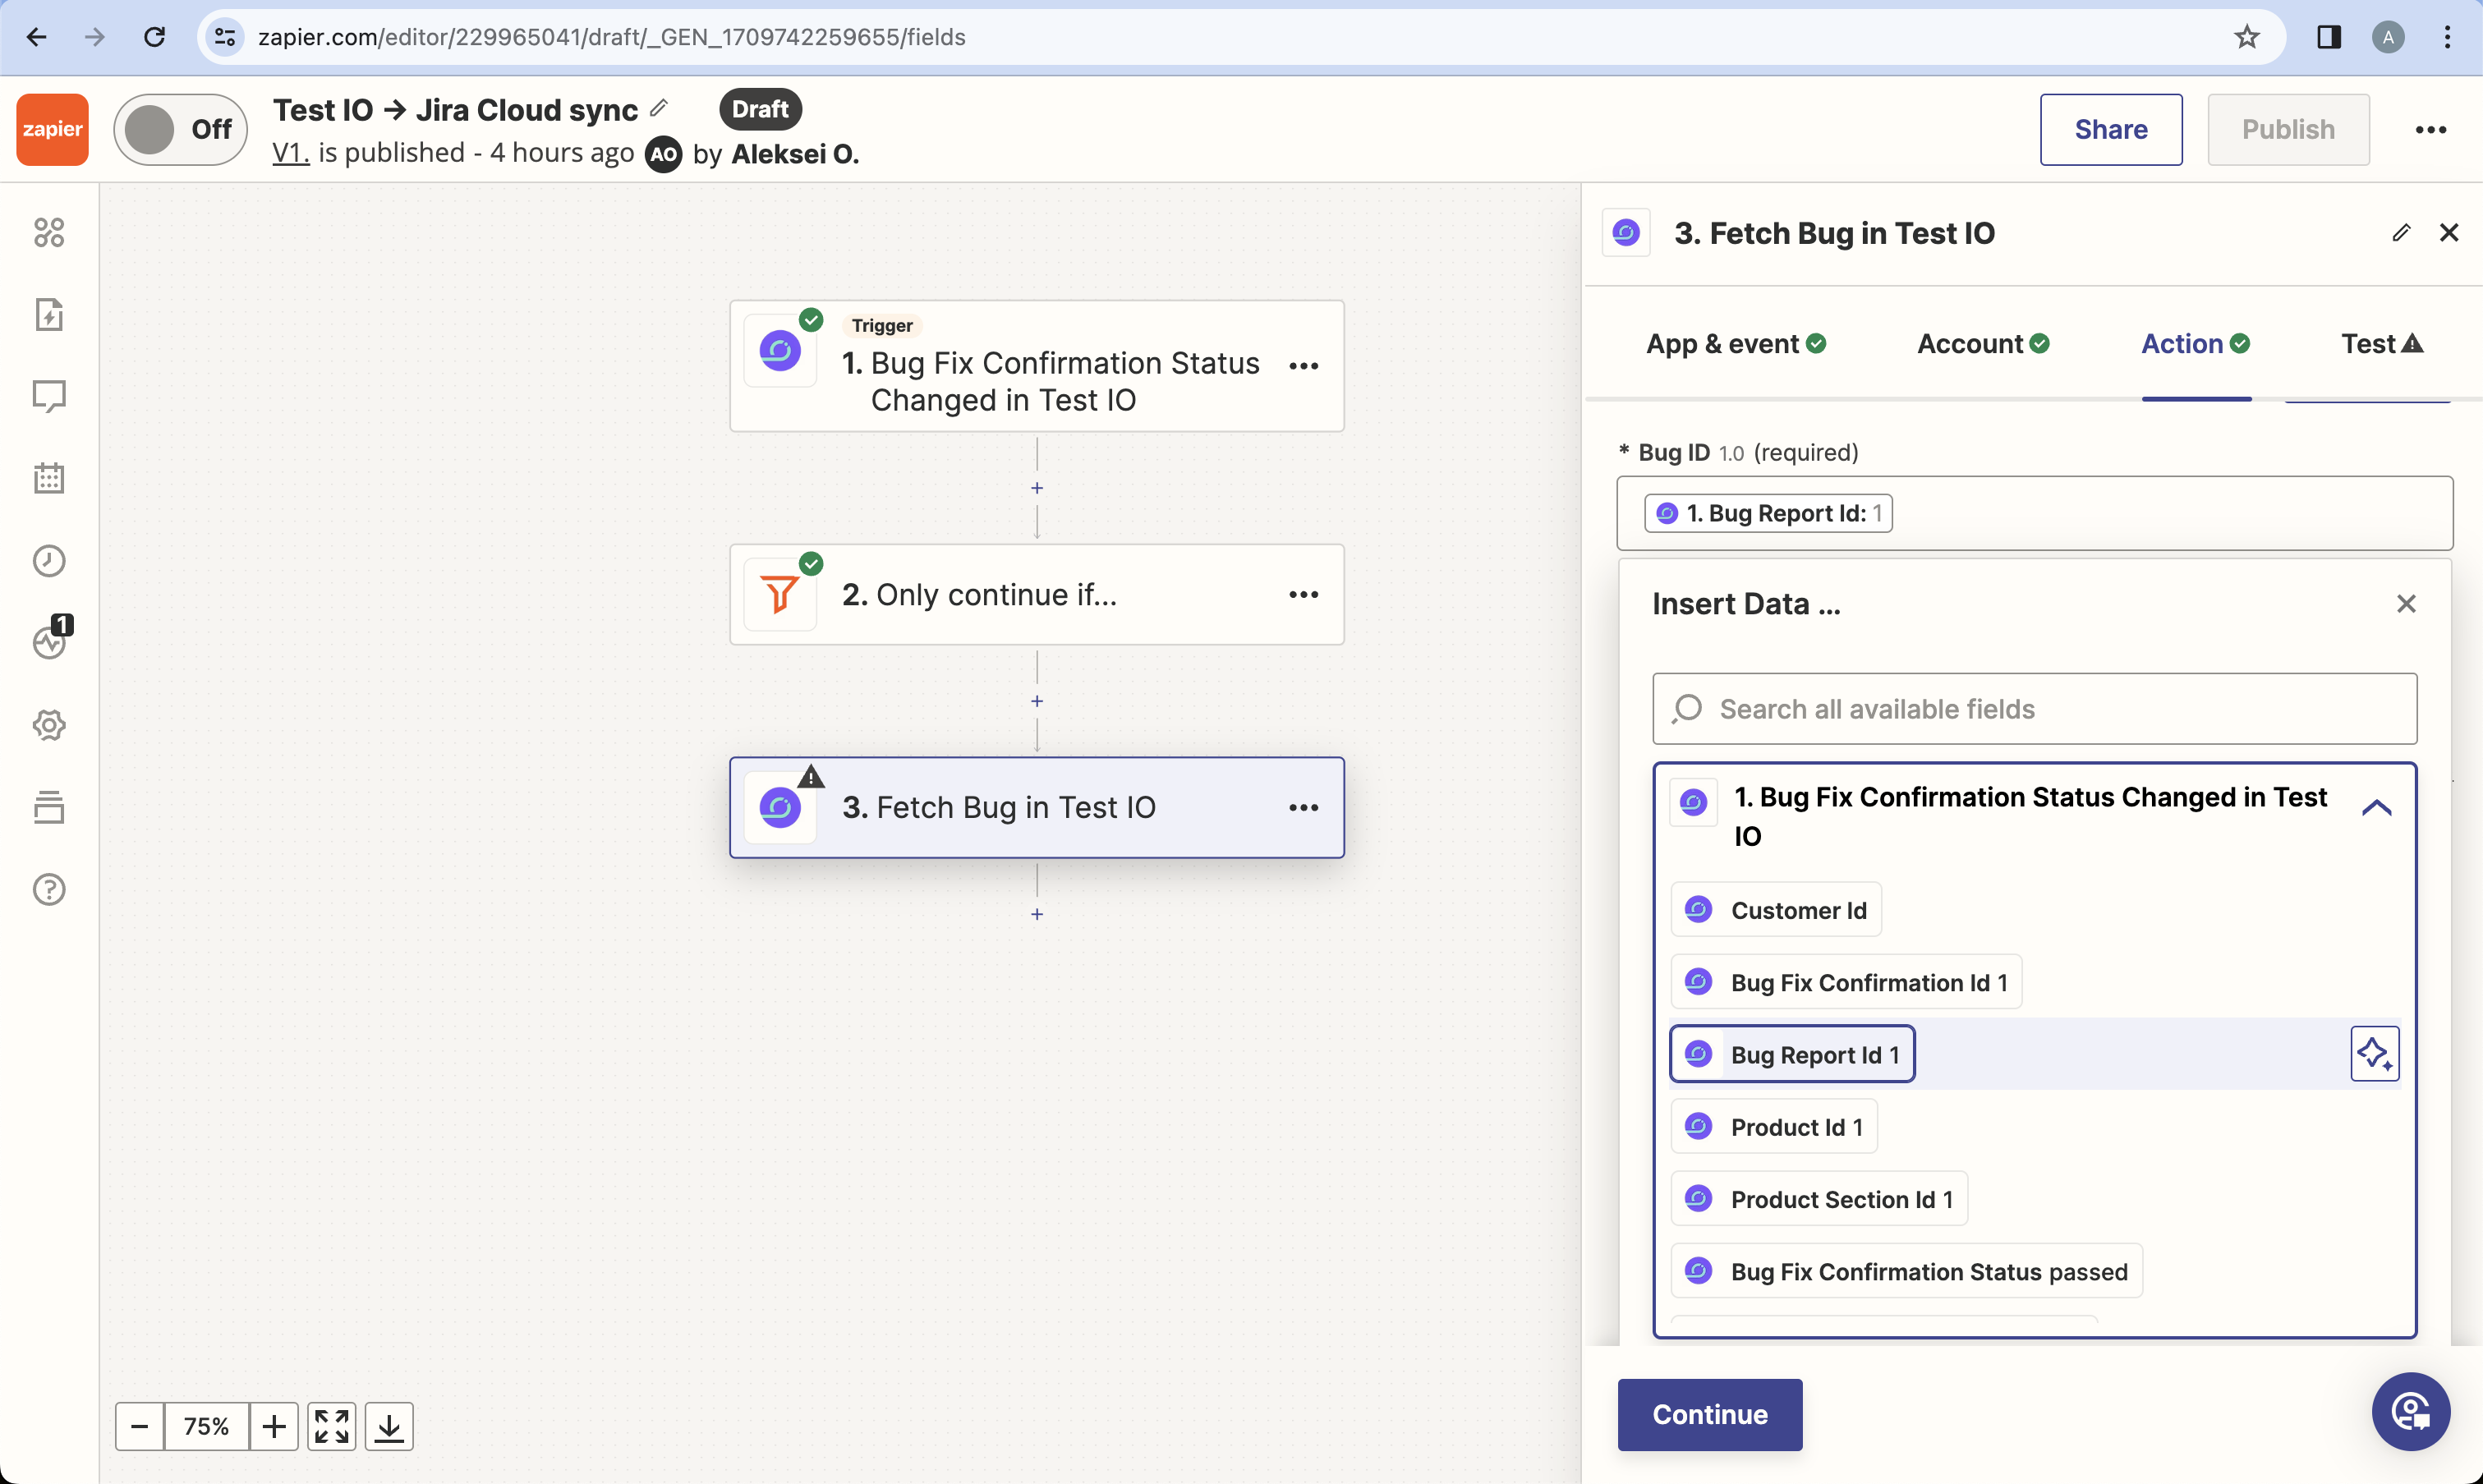
Screenshot 7. Configure action - Press "Skip test" as the bug with Bug ID provided in the step 4 doesn't exists in Test IO. Sample data will be used.
Configure Find Issue (Jira Software Cloud)
- Search for and select the Jira Software Cloud Zapier app.
- Select "Find Issue" as the Event and press Continue.
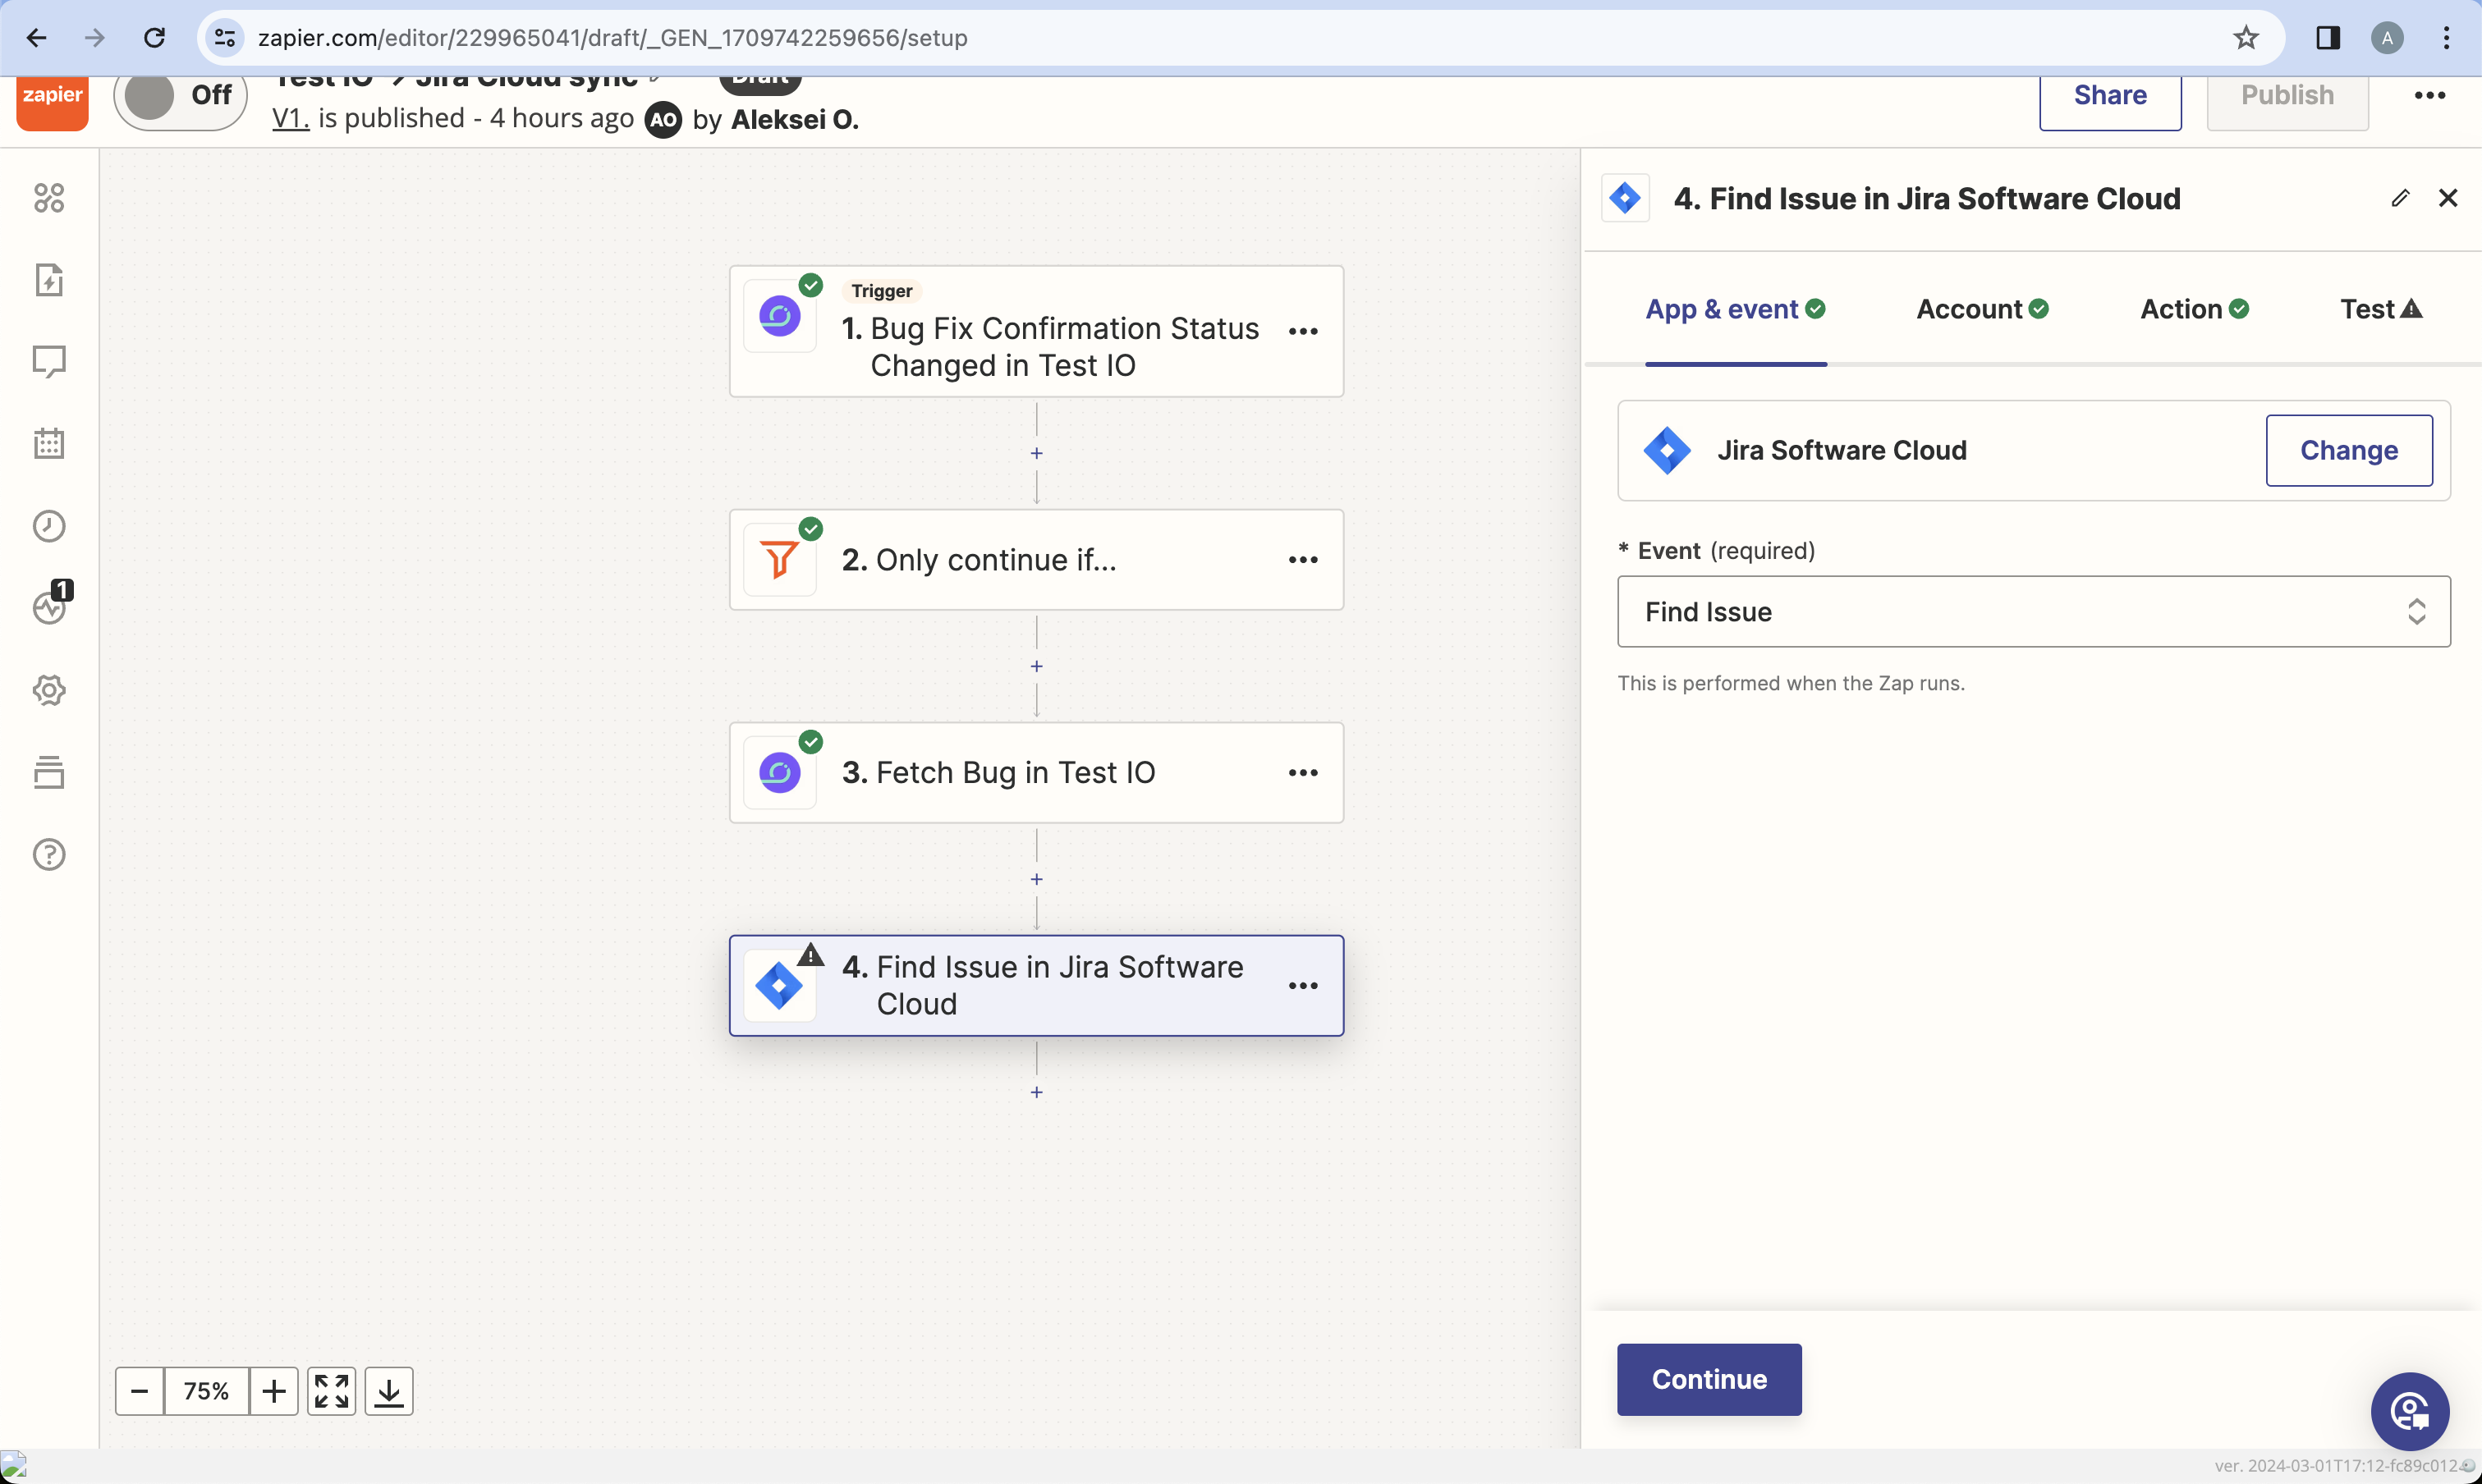
Screenshot 8. Select an action - (Account Tab) Authenticate with your Jira Cloud account if needed.
- (Action Tab) In the Key field, select "External Id" from the previous Test IO action's output. Press Continue.
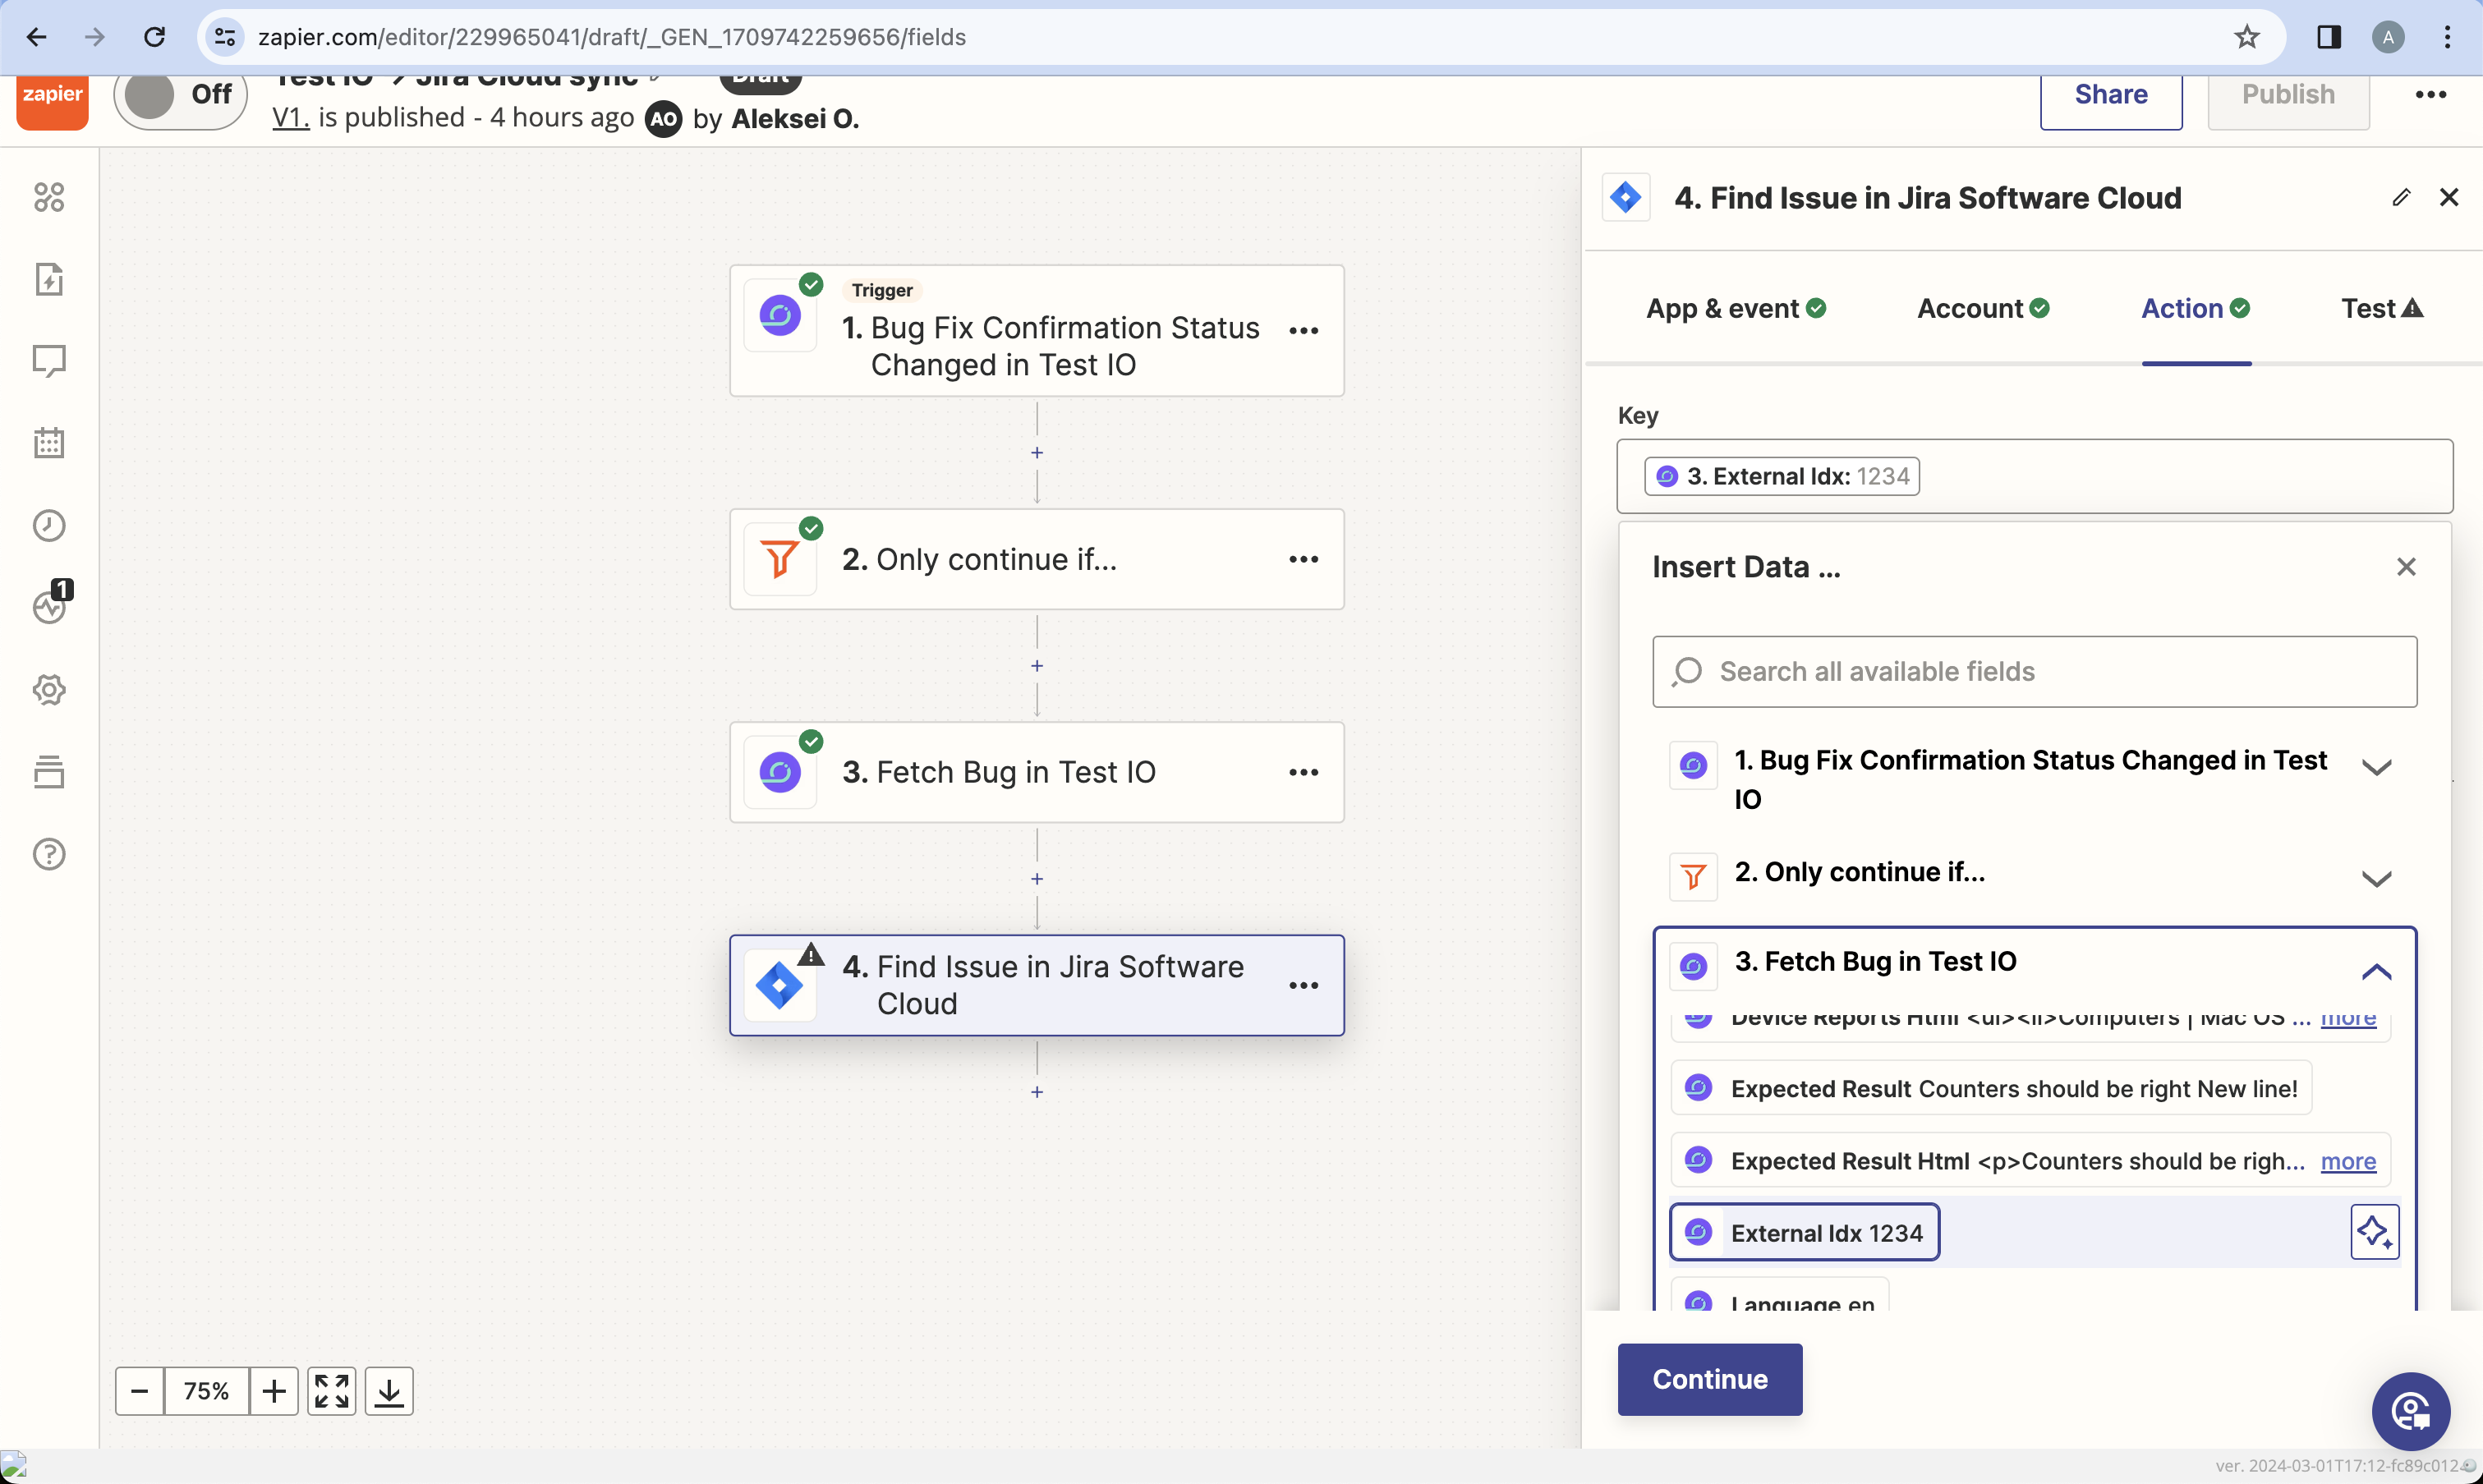
Screenshot 9. Configure action - Press "Skip test" as the Issue with Key provided in the step 4 doesn't exists in Jira Cloud. Sample data will be used.
Configure Update Issue (Jira Software Cloud)
Let's update the Jira issue's status:
- Search for and select the Jira Software Cloud Zapier app.
- Select "Update Issue" as the Event and press Continue.

Screenshot 10. Select an action - (Account Tab) Authenticate with your Jira Cloud account if needed.
- (Action Tab) In the Issue field, select "Key" from the previous action. Set the Status field to the appropriate value in your Jira Cloud workflow. Press Continue.
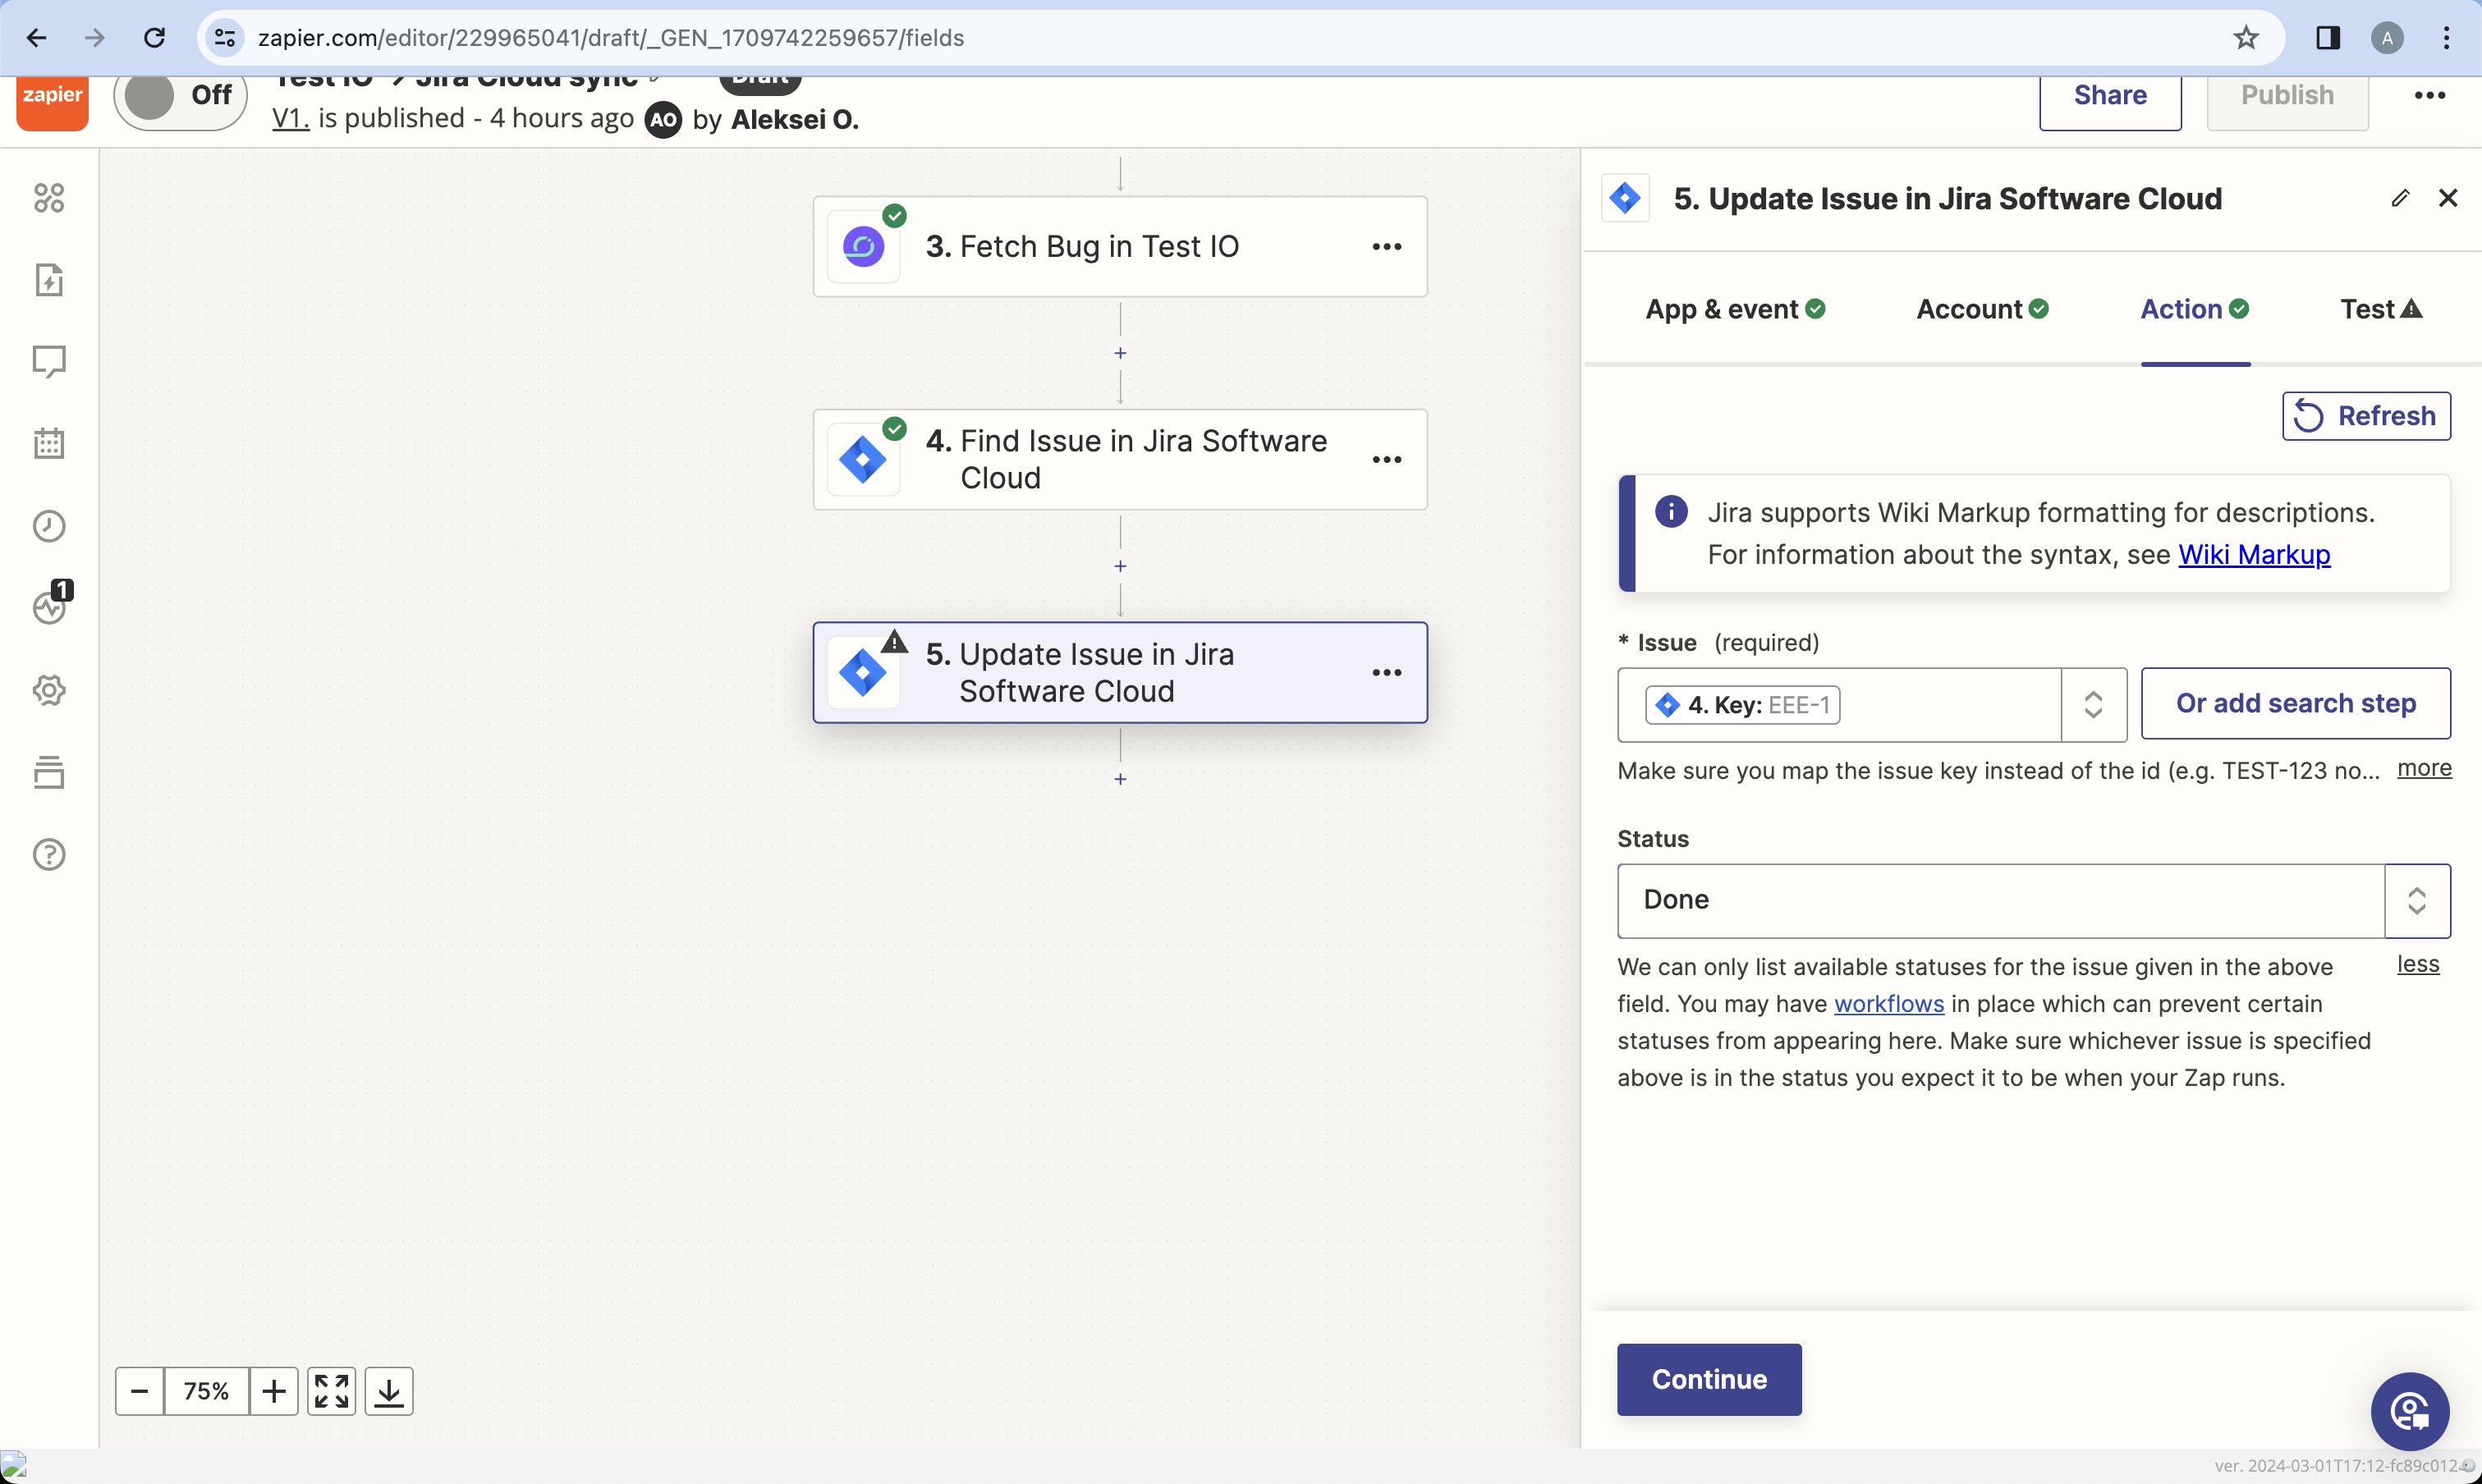
Screenshot 11. Configure action - Press "Skip test" as the Issue with Key provided in the step 4 doesn't exists in Jira Cloud.
- Publish your Zap!
Congratulations! You've synced bug statuses between Test IO and Jira Cloud. Customize this integration by replacing Jira Software Cloud with other Zapier-supported bug trackers (AzureDevOps, GitHub, etc.).